
How to take amazing photos in the Galapagos Islands

Every photographer should visit the Galapagos Islands at least once in their life. Once you’ve been, you will want to go back again and again. It’s a photographer’s paradise!
The remote islands off the coast of Ecuador are an ecosystem like no other. Over millions of years, many animals have migrated to the Galapagos and made new homes, gradually evolving into species utterly different from their mainland cousins.
The Galapagos Islands boast more unique species than any other region, and the animals, fish, and birds are easier to spot. Only a few islands are settled by humans, and only in a few places. The rest of the landscape is strictly regulated.
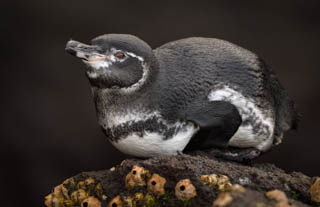
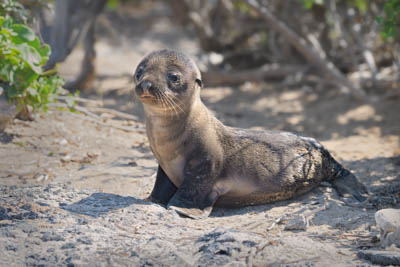
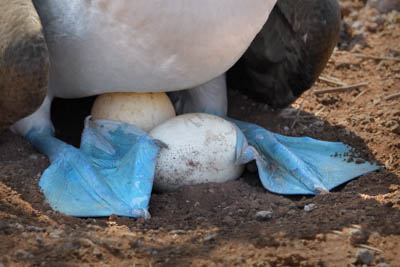
Since only a few people are allowed to explore yearly, the local wildlife hasn’t learned to fear us. Giant tortoises, sea lions, blue-footed boobies, and marine iguanas will come right up to you, practically posing for that perfect shot.
If you’re planning a Galapagos photo tour, follow our advice to get the most out of your trip. These simple tips will help you build a Galapagos photo gallery you’ll treasure for years to come.
Bring the right camera and photography equipment
Shooting in the Galapagos Islands rewards preparation. You probably won’t forget your camera or lens, but remember it needs memory cards and batteries to work. Bring more than you think you’ll need — you won’t regret it!
If you’re a wildlife photographer, you’re probably used to setting up tripods and a long lens to get shots of distant animals and birds. Things are different on the Galápagos, where you’ll find more animals than you know what to do with at every photo location, and they will be close.
Instead, focus on convenience and mobility when selecting your gear and lenses. The lighter, the better. You typically won’t need a tripod nor want to carry one around. Having a zoom lens around 100mm-400mm is ideal. Don’t forget that landscape lenses as this is a beautiful place, and you’ll want to capture the beauty of the surroundings. Leave that 600mm prime at home and sling a camera over your shoulder, and enjoy the wildlife and scenery. Make sure you have enough waterproof bags for everything since you’ll often have to make water landings with a panga or zodiac dingy.
If you plan on photographing wildlife underwater (which I highly recommend!), add snorkel gear and a waterproof camera to your luggage. The guides often provide the snorkeling gear, so make sure you ask before your trip.
If you’re going on a guided workshop, your guide should provide packing lists and guidance on planning for the trip.
Plan on photographing at the beginning and end of the day
 The Galapagos Islands are located right on the equator, so the sun is high over your head mid-day. That makes for a lovely time at the beach, but it’s not the best for photography.
The best times to photograph are in the morning and evening. Luckily, the equatorial location means sunrise and sunset are regular year-round, coming at about 6 AM and 6 PM daily. Schedule as much time as you can for photography in the morning and late afternoon.
Use the hours in between to travel to your next location or enjoy snorkeling, exploring, relaxing, or a siesta.
When booking a trip for photography, make sure you ask what times you will be on the islands.
Shoot animals from the ground level
Looking to change up your Galapagos Islands wildlife photos? Try lying down!
When you shoot from a prone position, you open up perspectives you’ve never considered before, revealing the unique markings, behaviors, and environments of Galapagos wildlife.
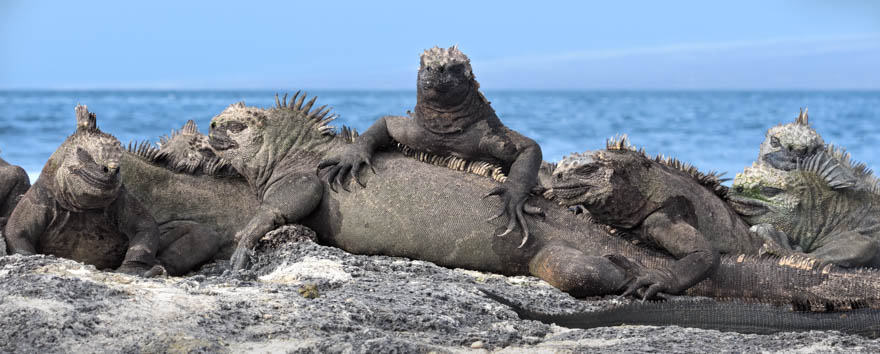
Lying in the sand is a great way to photograph marine iguanas, Sally Lightfoot crabs, sea lions, and more.
Respect the Galapagos wildlife
 The animals on the Galápagos Islands may have no fear of humans, but that doesn’t mean you can do whatever you want with them.
The Galapagos National Park requires visitors to maintain a strict distance of six feet (two meters) from all wildlife. That’s for their safety and yours — some animals, like sea lions, can attack when provoked.
There’s also a park-wide ban on flash photography to protect the animals and birds. If you’re having trouble getting enough light, try a higher ISO or open up your aperture a bit.
Be patient
 Finding animals and birds in the Galápagos may be easy, but you shouldn’t always snap the first shot that presents itself.
The more you observe the wildlife, the better you’ll get to know it until you notice behaviors you couldn’t see at the start.
When first shooting birds start with large, slow-moving birds like the greater flamingo, pelicans, or frigate birds. These species offer the perfect opportunity for you to hone your skills without the pressure of capturing fast, erratic movements. It gives you the chance to practice framing, focus, and timing.
All the best wildlife photographs tell a story. If you’re patient, you never know what kind of story will come to you next.
Take a guided photography trip to capture the best shots
 A photography tour of the Galapagos Islands involves a lot of moving parts. You need permits, transportation, meals, equipment, and a clear schedule. What’s the best way to tour the archipelago? Have someone else handle that stuff so you can focus on taking photos!
I’ve been leading photo tours for over 11 years. In that time, I’ve discovered lots of lesser-known spots bursting with opportunities for photographers of any level.
My tours make use of a luxurious private boat small enough to fit into the secluded bays and scenic inlets, staffed with a local crew who provide for your every need.
Check out all the details for our east islands Galapagos Photo Tour and our popular western route Galapagos Photo Workhsop and prepare for your Galapagos Islands adventure today!