
 In the latest version of Adobe Photoshop CC, there has been a new tool added that really adds a little “Pop” to images and removes (or adds) haze.
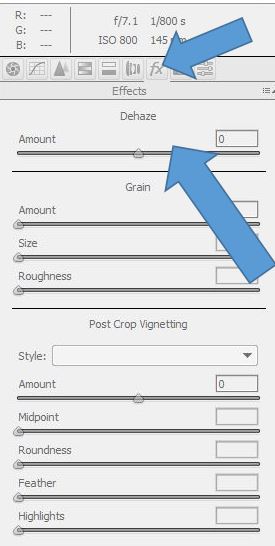
It’s called Dehaze.
There are two ways to access this tool.
- From the RAW editor, click on FX (Effects) icon.
- From within Photoshop, click on Filters, then the Camera RAW Filter, followed by the click on FX (Effects) icon.
I really like accessing the tool from the last option, as I have the capabilities to only use the tool on a select area using masks (Another topic for another day!)
Once in the tool, you can drag the slider to the right to reduce haze, or drag it to the left of increase the haze. This tool adds a little more depth to images and increases the contrast without making the image look over processed.
Below is an image I took this summer during the Grizzly Bear Photography workshop while we were heading to do a little puffin photography on this island with Mt. Redoubt in the background.
To show the effects of the dehaze tool, I just opened up the RAW image, and applied the Dehaze tool.
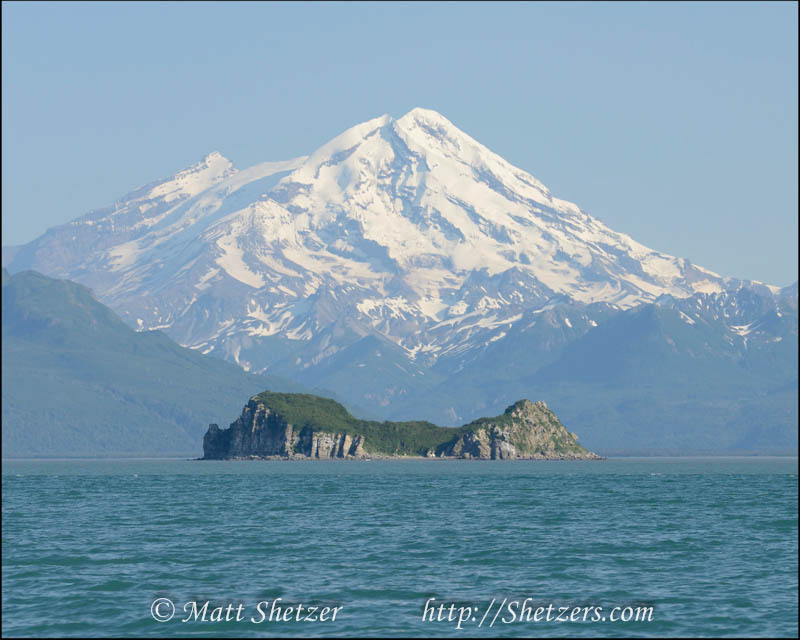
RAW File – No Dehaze applied
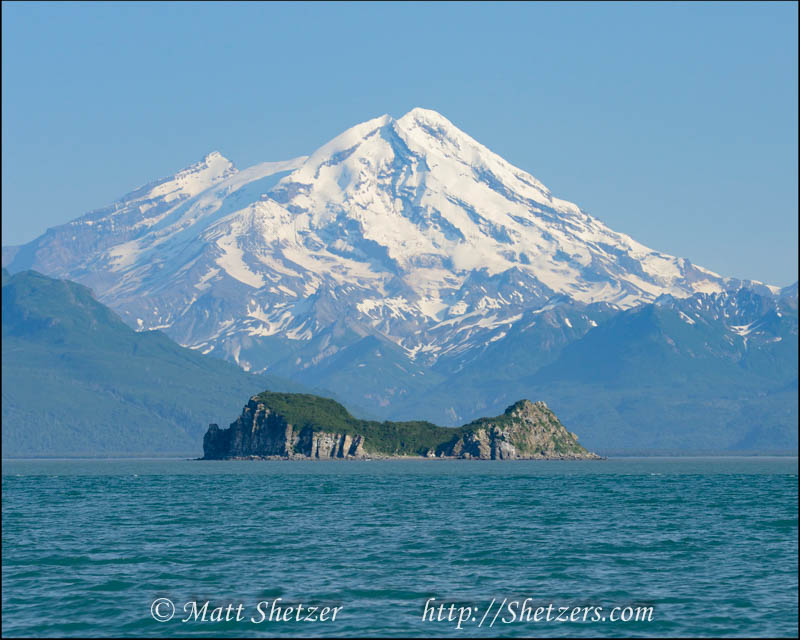
Dehaze Value of +25
Thats it for the Dehaze tool!
Come join us on one of our upcoming workshops and learn new camera and Photoshop techniques.
Photography Workshop Schedule